Creating Test Section
Start Creating Your Test
After logging in, you can create a new test by navigating to the Create Test Page. This page allows you to set up a test tailored to your specific needs.
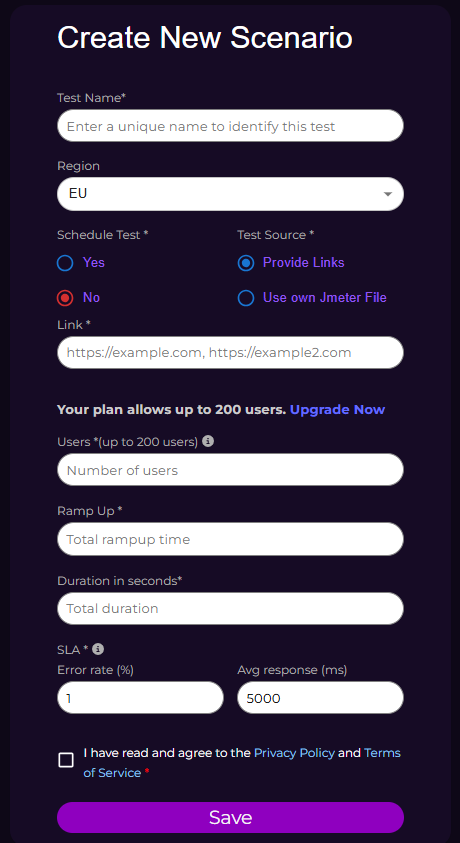
Test Configuration Fields
Your test will consist of the following fields:
- Test Name: Choose a descriptive name for your test.
- Region: Select the region where the load test traffic will be generated from — EU or KSA.
- Schedule Test: Choose Yes to run the test at a specific date and time, or No to start it manually from the dashboard.
- Test Source: Choose Provide Links to test one or more URLs, or Use own Jmeter File to upload your own JMeter script.
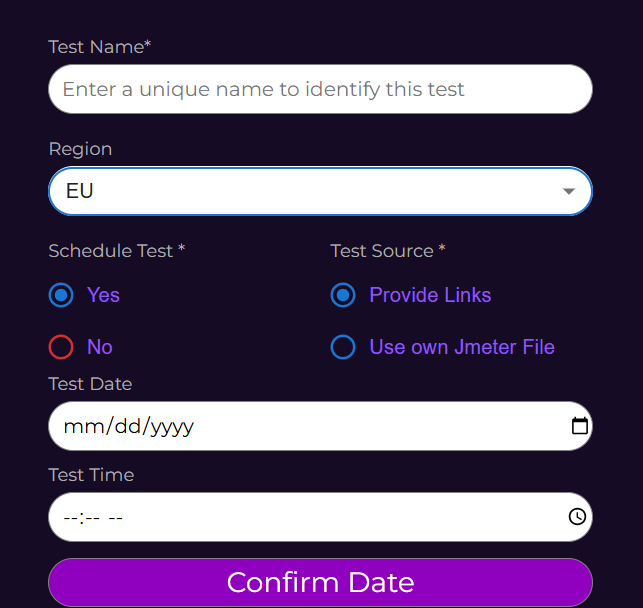
Scheduling a Test
If you select Schedule Test → Yes, the Test Date and Test Time fields appear. Fill both in and click Confirm Date — the platform confirms the scheduled moment back to you. The date must be in the future and no more than one year ahead.
Scheduling is a paid feature, available starting from the Monthly package. On lower plans the test can still be created, but it has to be started manually from the dashboard.
Option 1: Provide Links
Enter the URL you want to test in the Link field. You can test up to 10 URLs at once by separating them with commas:
https://example.com, https://example2.com
Only public http:// and https:// addresses are accepted — local and private addresses such as localhost or 192.168.x.x are rejected. If an address is invalid, the message appears right under the form and names the URL that caused the problem.
Option 2: Use Your Own JMeter File
Select Use own Jmeter File and two upload buttons appear:
- JMeter file — your
.jmxscript (maximum 10 MB). Required for this option. - Additional file — optional
.csvdata files used by the script. You can select several at once, up to 10 MB each.
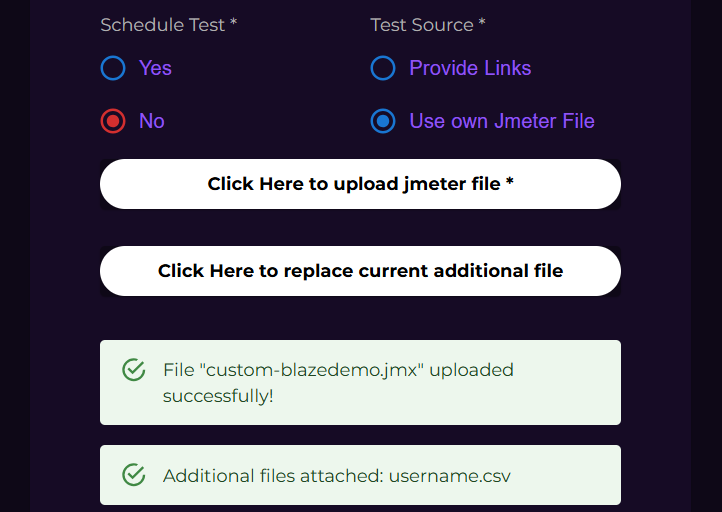
When you upload a script, the Users, Ramp Up and Duration fields are filled in automatically from its first enabled thread group, so you can check and adjust them before saving. Elements that are switched off in JMeter are ignored. If the script contains more than one enabled thread group, a warning tells you how many were found — your values are applied to each of them, which multiplies the real load.
Load Profile
These fields are required for both options — for uploaded scripts, the values are written into the JMX when the test is saved.
- Users: How many virtual users will simulate interactions. The label shows the maximum allowed by your plan; if you need more, an Upgrade Now link takes you to the pricing page.
- Ramp Up: The time, in seconds, over which all users are started.
- Duration in seconds: How long the test should run. The minimum is 600 seconds (10 minutes), and the maximum is set by your plan.
SLA
Every test carries its own SLA, which decides whether a run is marked Passed or Failed in the History Section.
- Error rate (%) — the maximum share of failed requests allowed. Default: 1.
- Avg response (ms) — the maximum average response time allowed. Default: 5000.
A completed run is marked Failed if either value is exceeded, or if the run produced no requests at all.
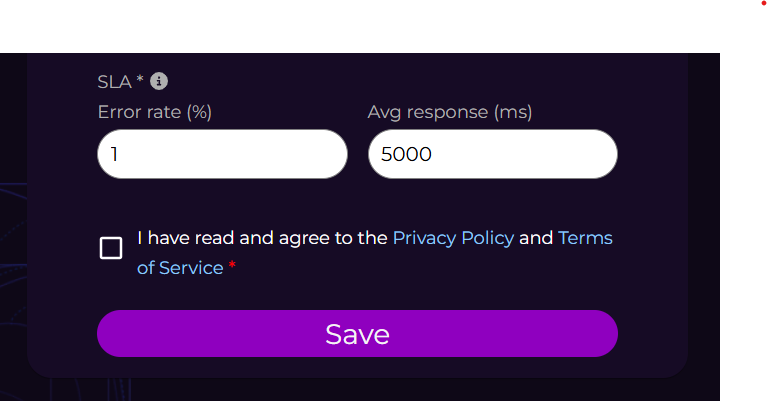
Finalizing Your Test
Before saving, tick the checkbox confirming that you agree to the Privacy Policy and the Terms of Service, then click Save and confirm.
Your test is added to the dashboard, where you can run and manage it as needed. If anything is missing or invalid, the reason is shown in a message under the form.